
Want a wedding veil made to your specifications, but don’t want to start out married life with a second mortgage? Consider making it yourself!
It really isn’t that hard, and it’s almost always cheaper than buying. The specifics will be as unique as you are, but the general steps to making your own veil are always the same.
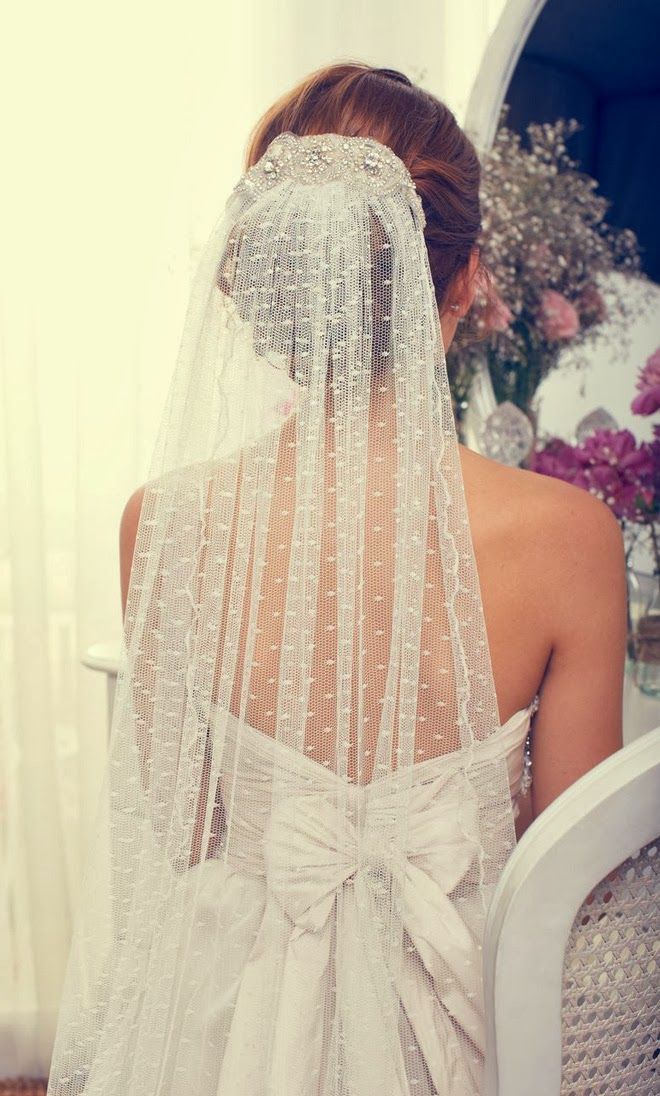
Step 1: Choose your veil’s style, shape, length, edging, and embellishments.
 The simplest design: a plain, single-tier veil with a comb attached. Adding tiers, decorations, and edging takes a bit more skill, but it’s still well within the abilities of a weekend-warrior seamstress.
To gauge the right length, measure from the point on your head where you’ll attach the veil to the point where you want it to fall. To get the exact shape and look you want, experiment with tracing, pattern or tissue paper. Or, find an inexpensive used veil with the right shape and take it apart to use as a pattern!
Then, to figure out how many yards of tulle, organza or chiffon you’ll need, add the total length of all tiers to the blusher length (if applicable), divide by 36 inches, then round up to the nearest yard. When you’re done — and you’ve settled on decorations and finishing touches — you’re ready for a big pat on the back … and step two.

Step 2: Go shopping!
The tulle’s width will determine how much you can gather your veil, which also determines how full it will be. A 45- or 72-inch width is fine for narrow veils with few or moderate gathers. But 108 inches is better for fuller, cascading veils. It’s hard to build a lot of fullness with narrow material.
Other supplies sure to come in handy: a rotary cutter (or sharp scissors), a pad to cut on, weights to anchor the tulle, measuring tape, pins, and needle and thread to match your tulle and edging. Plus, you’ll need fabric glue, toothpicks for detail work, embellishments or other decorations and the edging. If you plan to secure the veil directly to your hair, buy a plain veil comb. For a detachable veil, buy Velcro or bridal loops.
More: 14 Romantic Wedding Veils (We Found On Pinterest) | Know the Signs of a Quality Wedding Veil?
Step 3. Lay out and cut the fabric.
 You want the veil to be symmetrical, so start by folding the tulle in half lengthwise. That way, it won’t be obvious if one of your cuts is less than pure perfection.
As a guide when cutting the material, use the pattern you made earlier. To prevent sliding, lay coasters or other weights near the edges. Remember to fold the pattern in half just as before, and pin it to the material if needed.
Step 4. Finish the edges.
If you want a finished edge to your veil, practice! Some techniques, such as a rolled edge, are easier to master than others. But if you’re angling for a more complex edge — like ribbon, lace, or other flat trim — be sure to leave plenty of time to get it right before attacking the actual veil. Also, for that pro look, sew your edging 1/4″ to 1/2″ from the edge and trim back the excess when done.
Step 5. Add your embellishments!
 The easiest time to glue or sew rhinestones, pearls or other embellishments to the material is now, while the veil is flat.
But before gluing, spread foil or other non-porous material on the table (but not newspaper — the ink will bleed onto your veil). As with the edging, perfect your technique by practicing first. Allow the glue to dry before moving onto step 6.
Step 6. Gather the veil and sew on the comb.
Gather the veil and sew it to the veil comb with a running stitch, using heavy thread. For detachability, use bridal loops or Velcro instead of (or in addition to) the comb. To remove wrinkles, hang the veil from a hanger — in a steamy bathroom if necessary.
And now, your dream veil’s finished. Exactly what you wanted … at a fraction of the cost!